Have you ever heard that with something as simple as a plastic bottle, you can grow mint at home year-round? If you haven’t tried this technique yet, I assure you that running out of your favorite herb will never be a problem again. It’s also an economical, eco-friendly, and very easy-to-implement solution, ideal for those who want to make the most of small spaces or simply want to always have freshness in their kitchen.
In this article, I’ll explain step by step how to transform a plastic bottle into a small mint garden, including the care requirements, and the benefits of doing this in your home. Ready to turn simple waste into a useful resource? Let’s go!
WHY USE PLASTIC BOTTLES TO GROW MINT?
The idea of reusing plastic bottles to grow mint arose from the need to reduce waste and take advantage of materials we have on hand. Plus, plastic bottles are easy to obtain, portable, and perfect for creating a growing system in small spaces or even indoors.
Mint, for its part, is a very hardy plant that doesn’t require much space or complicated care. Thanks to this technique, you can have your plant fresh in any season, enjoying its aroma and scent in your meals, teas, or natural remedies.
Materiales que necesitas:
- Una botella de plástico de aproximadamente 1 a 2 litros (de refresco o agua)
- Tijeras o cutter (con cuidado y preferiblemente que sean para adultos)
- Tierra para plantas rica en nutrientes
- Semillas de menta o un esqueje saludable de una planta existente
- Agua
Instructions:
Bottle Preparation
Clean the bottle well and remove the labels. Then, cut the top, approximately halfway or slightly more, to create a wide mouth for easy access and ventilation.
Make Drainage Holes
At the base of the bottle, make 3-4 small holes using scissors or a box cutter. This is very important so that excess water drains and doesn’t flood the roots, preventing the plant from rotting.
Add Soil
Fill the bottom with potting soil, leaving about 5-7 centimeters free at the top. You can add compost or natural fertilizer to enhance the mint’s growth.
Planting
If using seeds, scatter them over the soil and cover lightly. If you prefer to use a cutting, plant the base in the soil, pressing gently to firm it.
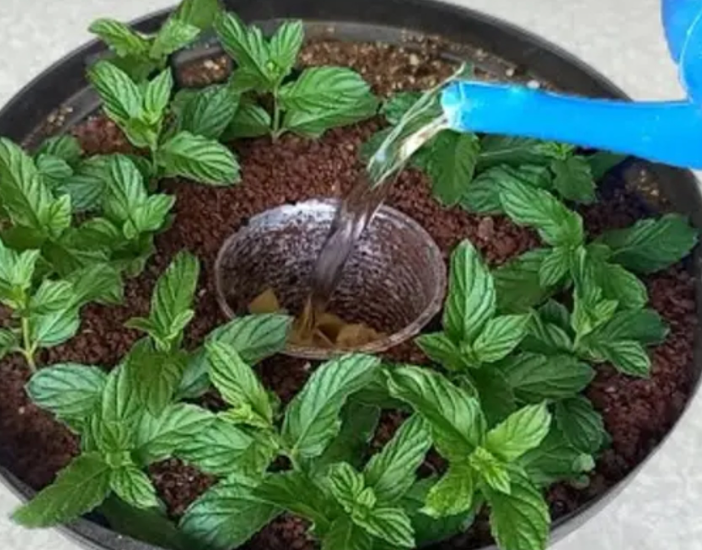
Watering and Positioning
Water gently until the soil is moist, but not waterlogged. Place the bottle in a well-lit location, preferably near a window that receives direct sunlight or on a balcony, so the plant grows strong and healthy.
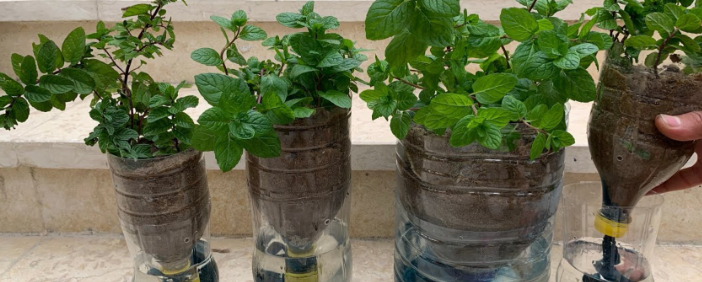
And what happens when mint grows?
With proper care, in a few weeks you’ll see your plant begin to grow and fill with green, aromatic leaves. The wonderful thing about this technique is that mint can continue to grow indefinitely if you take good care of it, and you can continue cutting leaves to use in your cooking or natural remedies.
Would you like some extra tips to keep it healthy?
Water regularly, but avoid overwatering.
If you notice the leaves starting to turn yellow or have pests, you can remove the affected parts and spray with a little water and natural soap.
To keep it strong, you can add a little natural fertilizer every month.
Want to know how to continue using your mint plant in different recipes and remedies?
Mint is perfect for making infusions, adding flavor to salads, flavoring desserts, or even preparing homemade remedies that help with digestive and respiratory problems. Having it at home is not only practical but also healthy.
And what are the benefits of growing mint in a recycled bottle?
It’s an eco-friendly option that helps reduce plastic waste.
You save money: instead of buying plants from nurseries, you can start with scraps and cuttings.
The plant adapts easily, even in indoor or outdoor environments.
See More:

 Unraveling the UFO Enigma: When Did UFOs First Appear?
 Top 5 Once In A Lifetime Songbirds

 A homeless kitten mewled and dragged its paws
 Alien Languages: Can We Decode Extraterrestrial Communication?